This post may contain affiliate links. Any sales made through such links will reward me a small commission – at no extra cost for you!
Ah, the gifting season… Such a beautiful, special, but often pretty stressful time. But you can take away a good portion of the stress by planning upfront which gifts you can prepare for your loved ones. And DIY spa gift baskets seem to be everyone’s favorite lately.
I certainly loved receiving them. The love and care put into them, the personalized card, the attention to details… All that makes these gifts truly special and add value you cannot find in a store.
DIY spa gift baskets are a great, thoughtful idea, whether you are looking for a present for your mom, sister, best friend, favorite aunt or anyone special in your life. And not just for Christmas – you can make them for New Year’s Eve, birthdays, Valentine’s Day, bridal shower or just as a ‘thank you’.
Just change the main color and the theme of the basket. Add a very special personalized birthday card to a birthday gift basket. A Christmas ornament to a Christmas basket. And rose petals would make a DIY Valentine spa gift basket truly special.
And when deciding what to put in the baskets, you don’t have stop at skincare. Once you’ve filled them with the homemade spa goodies and themed them appropriately, you can always add a little something extra, to make the basket extra special.
Add a fluffy towel, fuzzy socks, scented candle, scrunchie or hair band, massage roller, cookies (store bought or homemade), a box of chocolate, self-care journal or even a good book…
Just something small and not very expensive that will show just how much thought you have put into the gift. It’s the idea and creativity that matters. None of these things need to break your budget or take all of your time.
Selecting the Homemade Spa Products for DIY Spa Gift Basket

Granted, when making a DIY spa gift basket, the first thought on your mind would probably be the receivers and how to best surprise them. However, there are also a few practical things to consider when choosing which products to add to their baskets.
Number one thing would be the cost. A dash of luxury could make the gifts really special, but more than a dash could be very heavy on your wallet, especially if you are making multiple baskets.
A way to balance this out would be to add one pricier ingredient (for example, some really cool essential oil), while the rest of the ingredients can be pretty basic. The scent is usually enough to make the whole basket seem luxurious, plus it adds a ‘theme’ to the products.
You should also make sure that the products you’ll be making are not very demanding. The last thing you need is to end up with products that are just not turning out right (happens to the best). Plus, you will probably be shorter on time around the holidays, so you don’t need this project to take your whole days.
Count in the time you’ll need to make the labels, wrap up everything and arrange it nicely, and it’s easy to see how everything can quickly spiral out of control. And that is not what we want.
Making spa gift baskets should be a fun, creative project and you should be enjoying putting all your love and care into these mini spa treats. So, too complicated products with too many steps and too many ways to go wrong are not what we are doing here.
Why the products down below are a great choice

The products down below are specifically selected as some of the best options you have for 5 important reasons:
- They are super easy and fast to make.
- Most of the ingredients are not crazy expensive, plus most of them have cheaper alternatives.
- If you put some effort into making pretty, personalized labels and choose some nice jars, these humble products can look like a million bucks spa goodies.
- Using these products for an at home spa day can be an excellent self-care option and your loved ones will remember you every time they are using them.
- If you make sure to check the expiration dates for all of the ingredients and to thoroughly cleanse the bowls and containers (I like to rub them with some rubbing alcohol), all these products should have a shelf life of at least several months.
So, check out down below your 8 best options to put into a DIY spa gift basket. You can make all of these products for each basket or choose as many as you want…
8 Best Products to Put In A DIY Spa Gift Basket

Before we get to the recipes, I just want to talk about the essential oils a bit first.
Essential oils can be pretty expensive. It doesn’t really make sense to buy a bunch for the gift baskets, especially when you can hardly use the whole amounts.
It’s a different story if you’re already into essential oils and already have several at home. Then you can even scent every product differently if you want. But, if you have to buy a bottle specifically for this project, I’d suggest that you buy one or two that you really like and use them for all the products.
(Personally, I’d probably use the same scents anyway. Just to connect the products thematically, if that makes sense. Plus, many different scents can be a bit overwhelming.)
So instead of me suggesting which essential oils you should use in your products, in the recipes down below I only included approximate amounts. I’m leaving it to you to decide whether you’ll be using only one oil or a combo for all products, or you will mix and match.
If you don’t have any idea of what you may use, I think that lavender and peppermint combo are a great choice for the holidays. So are the vanilla and citrus. And if you want something really extra, jasmine or rose essential oil are sure to wow everyone.
OK, now to the recipes…
1. Relaxing Diy Bath Salts

Bath salts make such perfect gifts! They are super easy and fast to make. Plus, they are soothing, relaxing and just the best thing anyone could use after a long, stressful day. Like encouraging your loved ones to take some time for themselves and dedicate it to self-care!
You will need:
- 3 cups fine Epsom salt
- 1.5 cup pink Himalayan salt (or any other medium coarse sea salt)
- 1/2 cup colloidal oatmeal (or grind some organic rolled oats until you get fine powder)
- 20 – 30 drops essential oils of your choice
- optional: 3 – 4 tablespoons dried flowers or herbs (you can match this with the essential oil you are using, but you don’t have to)
With these amounts, you will get around 5 cups of bath salts. So think about how large jars you’ll be using and how many jars/gifts you need, and adjust the amounts of the ingredients accordingly.
To make them, all you need to do is mix the salts and colloidal oatmeal in a large bowl. Add the essential oil and mix thoroughly. In the end, add the dried flowers and stir everything one more time.
Transfer the mixture into mason jars or any other pretty containers. Specify on the label that they should use 1/2 – 1 cup of the salts for each bath. They can store the salts in a cool, dry place up to 6 months.
2. Exfoliating Body Sugar & Salt Scrub

Another addition to a DIY spa gift basket everyone will love! Every skin needs some gentle exfoliation every once in a while. So it can be very handy to have a jar of all-natural, gorgeous smelling, nourishing body scrub in a subtle pink and white color…
For around 4 cups of the body scrub, you will need:
- 2 cups white sugar
- 1 cup Himalayan pink salt
- ½ cup coconut oil
- ½ cup jojoba oil (or any other skin-friendly oil)
- 15 – 20 drops essential oil
If the sugar and salt you are using are too coarse, you can pulse them in a blender a few times to get a bit finer texture. But, don’t overdo it – the scrub needs to have some texture in order to exfoliate the skin.
Anyways, put the sugar and Himalayan salt in a large bowl. Melt the coconut oil and add it to the previous mixture. Add the jojoba oil and the essential oil too and mix everything well together.
Transfer the scrub to glass jars. This scrub should be used 2 – 4 times a month during the shower by gently massaging it into the skin for around 5 minutes before washing it off.
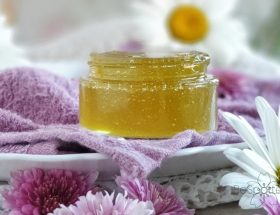
3. Nourishing Whipped Body Butter

Whipped body butters are amongst the most luxurious skincare products. Their rich texture, amazing moisturizing abilities and skin protecting properties made them very popular in the last few years.
To make around 4 cups of DIY body butter, you will need:
- 1 cup shea butter
- 1 cup cocoa butter
- 1 cup coconut oil
- 1 cup jojoba oil (or any other skin-friendly oil)
- 20 – 30 drops essential oils
Put the shea butter, cocoa butter and coconut oil in a glass or porcelain bowl. Place the bowl over a pan of boiling water, creating a double boiler. Stir occasionally until everything slowly melts on a low heat.
Add the jojoba oil, stir and remove from the heat. Let the mixture cool down a little and add the essential oils. Put the mixture in the fridge for around an hour or until it starts to harden around the edges but is still somewhat soft. At that point, use a hand mixer to whip the mixture until it turns light, creamy and fluffy.
Spoon the mixture into the jars you’ve prepared. This body butter should be good for at least 6 months, depending on how it is stored and the exact ingredients used. The best way to use it is right after a shower, while the skin is still slightly damp.
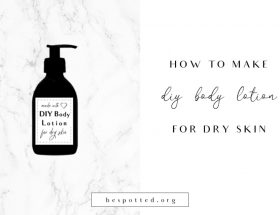
4. Beautiful Diy Lotion Bars

Depending on the occasion for which you are preparing your spa gift baskets, you can customize the shape of the lotion bars by using different silicon molds. So, use snowflake or Christmas tree molds for Christmas, hearts for Valentine’s Day, flowers for Mother’s Day, etc.
With this amount, I usually get 12 lotion bars with my molds, but this will obviously depend on the size of your molds.
- 1 cup shea butter (you can replace it with cocoa butter)
- 1 cup coconut oil
- 1 cup beeswax pastilles
- 15 – 30 drops essential oils
- optional – you can add some dried rose petals or lavender buds
Slowly melt the shea butter, coconut oil and beeswax in a double boiler. When everything turns liquid, remove from the heat, add the essential oil and stir well.
You can just carefully fill your molds with the mixture. Or, if you are using any dry flowers, place a small pinch of dried flowers into each mold cavity. With a spoon, add small amounts of the mixture into every mold and let it set for around a minute. Then pour the remaining oil mixture until you’ve filled your molds.
Place the molds in the freezer for around 30 – 60 minutes. Let the lotion bars cool completely before attempting to pop them out of the molds. The best way to wrap this little beauties for a gift basket would be to wrap each separately in some cellophane and add a nice ribbon.
5. Simple Diy Lip Scrub

Lip scrubs became so popular lately because these adorable little things can help you get a prettier pout in just a few seconds and with no any serious effort. They are also a popular choice for DIY spa gift baskets because they are cheap, ridiculously easy to make and everyone loves to receive one of those cute little jars.
For a little less than 1.5 cup of the lip scrub, you will need:
- 1/2 cup white sugar
- 1/2 cup brown sugar
- 1/4 – 1/3 cup jojoba oil (or any other liquid plant oil)
- 2 tablespoons raw honey
- 1.5 teaspoons pure vanilla extract
Start by mixing the white and brown sugar (if they are too coarse, you can grind them a bit in a mortar). Add the honey and the vanilla extract and mix. In the end, add just enough jojoba oil to get a texture similar to wet sand.
Transfer the mixture into small glass jars. I like to use the 1 oz. jars for lip scrubs, but you can use whatever you want.
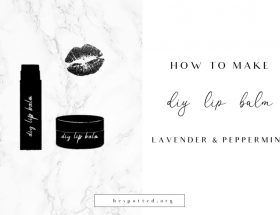
6. Super Moisturizing Lip Balm

And after that lip scrub, they will certainly need some nourishing lip balm, to lock in the moisture and make their lips soft, smooth and protected. This chocolate-scented lip balm is great for people who don’t want any essential oils in their lip products.
If stored properly, this lip balm should last for at least 6 months. With the following amounts, you should get around 3 full lip balm metal tins:
- 1 heaping teaspoon beeswax
- 3 teaspoons cocoa butter (you can use shea butter)
- 2 teaspoons jojoba oil
- 5 drops vitamin E oil
- optional – 10 – 15 drops essential oil
Melt the beeswax and cocoa butter in a double boiler. When they are completely liquid, add the jojoba oil, stir and remove from the heat. Then add the vitamin E oil and, if you want, your essential oil and mix.
While still liquid, pour the mixture into your prepared containers. Leave them to cool and solidify.
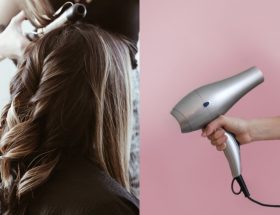
7. Nourishing Diy Hair Oil

Hair oil blend is another handy thing to have on hand for every time the hair gets dry and dull. The blend down below can be used as a treatment for split ends (just apply a few drops to the ends after the blow dry). Or it can be used as a scalp treatment, before washing the hair.
- 1/2 cup castor oil
- 1/2 cup jojoba oil
- 10 – 15 drops essential oil
Most essential oils are great for hair, so you can probably just use whatever oil you’ve been using for all the other products. Essential oils that are especially hair-friendly are: lavender, rosemary, clary sage, thyme, lemongrass, tea tree, peppermint, cedarwood, ylang-ylang, bergamot…
To make this blend, literally all you need to do is mix all the ingredients well together. For storage, you can use either dropper bottles or some pretty small glass bottles. Just go and find something on Amazon, you have so many beautiful options.
8. Relaxing Diy Massage Oil

And in the end, give your loved ones some more excuse to pamper themselves and enjoy some relaxation time.
Now, as we already said, buying several different oils can be quite heavy on your budget. So, I’m not giving you a recipe-recipe for this one, I’ll more try to help you work with what you already have on hand.
And the first thing you will need is a carrier oil. You can use whatever carrier oil you’ve been using for the previous recipes. The oils that are particularly good for massage blends are jojoba, grapeseed, sweet almond, avocado and fractionated coconut oil.
Next thing you’ll need is essential oil. Many essential oils would work great for massage, so depending on which oil you’ve bought for the previous recipes, you may be able to use that one here as well.
Some of the essential oils you can use for massage oils are: lavender (relaxing), peppermint (cooling), bergamot (uplifting), clary sage (to calm mood swings), frankincense (for emotional balancing), eucalyptus (refreshing), grapefruit (reduces fatigue and anxiety), etc.
You can use just one of these oils, which I recommend if you are a beginner in aromatherapy. Or you can mix and match them. In either case, you will need 10 – 12 drops total of essential oil for each 1 oz. of carrier oil.
My favorite massage oil blend is: in 1/4 cup grapeseed oil I like to add 12 drops frankincense, 4 drops lavender and 4 drops peppermint essential oil. But again – you can just use one essential oil, as long as it is suitable for massage blend.
For an easy, mess-free use, your best storage options would be either dropper bottles or glass bottles with lotion pump.
Happy holidays, everyone!