This post may contain affiliate links. Any sales made through such links will reward me a small commission – at no extra cost for you!
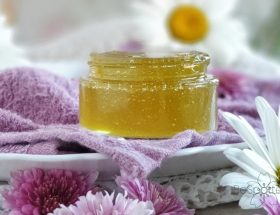
DIY lotion bars recipe – how to make your own rose & coconut oil lotion bars. Vegan friendly. Perfect for dry or sensitive skin, winter skincare and travel.

DIY lotion bars have become a huge thing lately. They are customizable. They look gorgeous and smell divine.
Lotion bars are practical and easy to carry around. And, unlike with standard lotions, you don’t have to worry about the oil–water emulsion. So, they are easy to make and suitable for beginners.
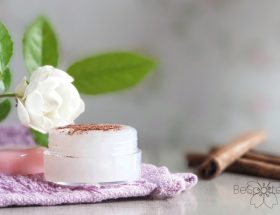
Lotion bars are super nourishing soap-like solid body butters that melt on contact with the skin. You can use them as body moisturizers, hand creams, massage bars etc.
This DIY lotion bars recipe is especially good for sensitive, dry skin and preventing premature aging signs, and here’s why:
The Ingredients for DIY Lotion Bars Recipe:
Coconut oil
Coconut oil is one of the best natural products for your skin and hair. It contains linoleic and lauric fatty acids that moisturize the skin and keep it plump and supple.
Coconut oil is solid at room temperature but melts on contact with the skin. This feature makes it perfect for DIY lotion bars.
Coconut oil has antibacterial and anti-inflammatory properties. It repairs your skin and protects it from the weather and other harsh environmental influences. This oil is often used to treat acne prone skin and prevent premature aging signs.
For this lotion bars recipe, use only organic virgin cold-pressed coconut oil.
Shea butter
Almost every lotion bars recipe includes shea butter. It contains vitamins A, E and F as well as oleic, stearic, linoleic and palmitic acid. The high content of fatty acids makes it a great moisturizer that provides your skin with all it needs to be soft, smooth and supple.
Shea butter is great for dry, sensitive or aging skin. It protects your skin against free radicals, encourages collagen production and makes the skin firm and elastic.
It seeps deep into your skin, providing all layers with nourishing, protective ingredients. All of this makes shea butter a great choice for any DIY lotion bars.
Here are some more ideas on how you can use shea butter in DIY beauty products for your skin and hair.
Soy wax
Every lotion bars recipe needs some sort of wax, to make the bars solid. Soy wax has a couple of advantages over beeswax.
It is vegan friendly. Beeswax’s natural scent will interfere with the essential oils you are using and affect the final scent. And soy wax melts on lower temperatures than beeswax. This means you don’t have to overheat the oils and butters to get a well combined mixture.
Soy wax is made from the oil of soybeans. It is very beneficial to the skin, since soy contains high amounts of vitamin E.
You can use soy wax to treat dry, cracked and rough skin. It creates a barrier on the surface of the skin and helps protect it from the cold, windy weather and drying conditions.
Rose essential oil
Rose essential oil has many benefits for your health and wellbeing. It helps with depression and relieves stress and anxiety. This oil also helps ease spasms and has antiseptic and anti-inflammatory properties.
When it comes to your skin, rose essential oil has the ability to strengthen the skin tissues. It makes your skin look firm and plump and gives you a younger appearance. Rose essential oil is a natural moisturizer that soothes the skin, keeps it well-nourished and prevents premature aging signs.
But, for this DIY lotion bars recipe, you can replace rose essential oil with any other scent you like. Lavender, jasmine, citronella or any other skin-friendly essential oils would all be a great choice.

You can use anything you want as molds for your DIY lotion bars, but silicon molds are the most practical. They offer a variety of shapes and sizes and it is so easy to pop the finished lotion bars out of silicon molds.
You can also pour the mixture into empty stick containers or twist-up tubes – they are handy when you want to apply DIY lotion bars without greasing your hands.
DIY Lotion Bars Recipe
The ingredients you need for this lotion bars recipe:
- 1 cup coconut oil
- 1 cup shea butter
- 1.2 cups soy wax
- 2 teaspoons rose essential oil
- 1 teaspoon vitamin E oil
How to make DIY lotion bars:
In a double boiler, melt soy wax. You can use beeswax instead, but you will get a bit different, thicker texture. If you’re using beeswax, add only 1 cup instead of 1.2 cups, so that your lotion bars don’t get too thick.
When the soy wax is melted, add coconut oil and shea butter. Stir occasionally until everything melts.
It is very important to do this on a lower heat. If you warm up shea butter too much, its particles break apart and cannot realign properly when it cools back down, and you might get grainy lotion bars.
When your mixture is completely liquid, remove it from the heat and stir in the essential oils. Pour the mixture into your desired molds; do this quickly, before it cools down and solidifies.
All you have to do now is wait for your lotion bars to harden. They are done when they turn opaque.
Take the lotion bars out of the molds. Keep them in clean, dry glass or metal containers.
When you want to use DIY lotion bars, just rub one on your skin. The lotion bar will start to melt, providing your skin with moisture, deep nourishment and protection.
Using the measurements above, depending on the size of your molds, you should get 8 – 12 DIY lotion bars. Their shelf life should be as long as the shelf life of the ingredients you’ve used, though essential oils can extend it a bit.
You can use this DIY lotion bars recipe as it is or customize it to your liking. And don’t forget to make more and share them with your friends – DIY lotion bars make great, personalized, thoughtful gifts.
Hope you like this DIY lotion bars recipe. If you’d rather try out standard DIY moisturizers, check out these recipes for DIY Lotion for Dry Skin and DIY Whipped Body Butter.